Here is a quick overview of how to grant access in TeamViewer to a remote user that you are connecting to. Scroll down for Mac instructions.
Windows
There are two methods to enable access in windows.
Method 1)
Get to Extras –> Options –> Advanced –> Show advanced options
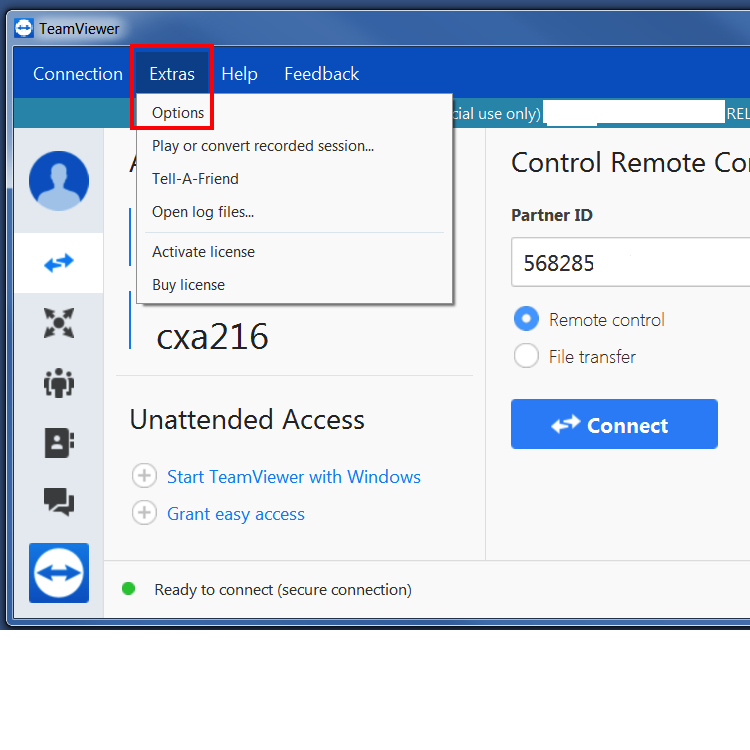
Open TeamViewer window. Once you have done that, click on Extras then Options
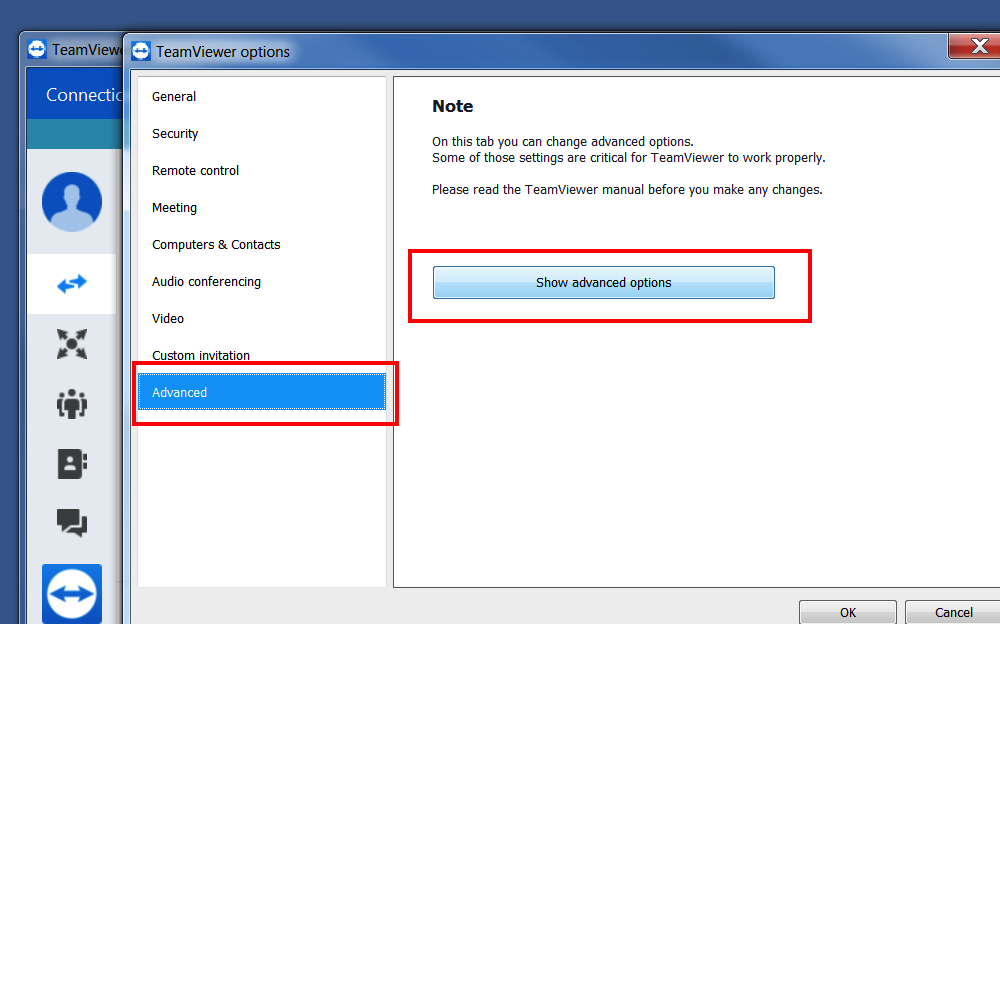
Click on Advanced then Show advanced options
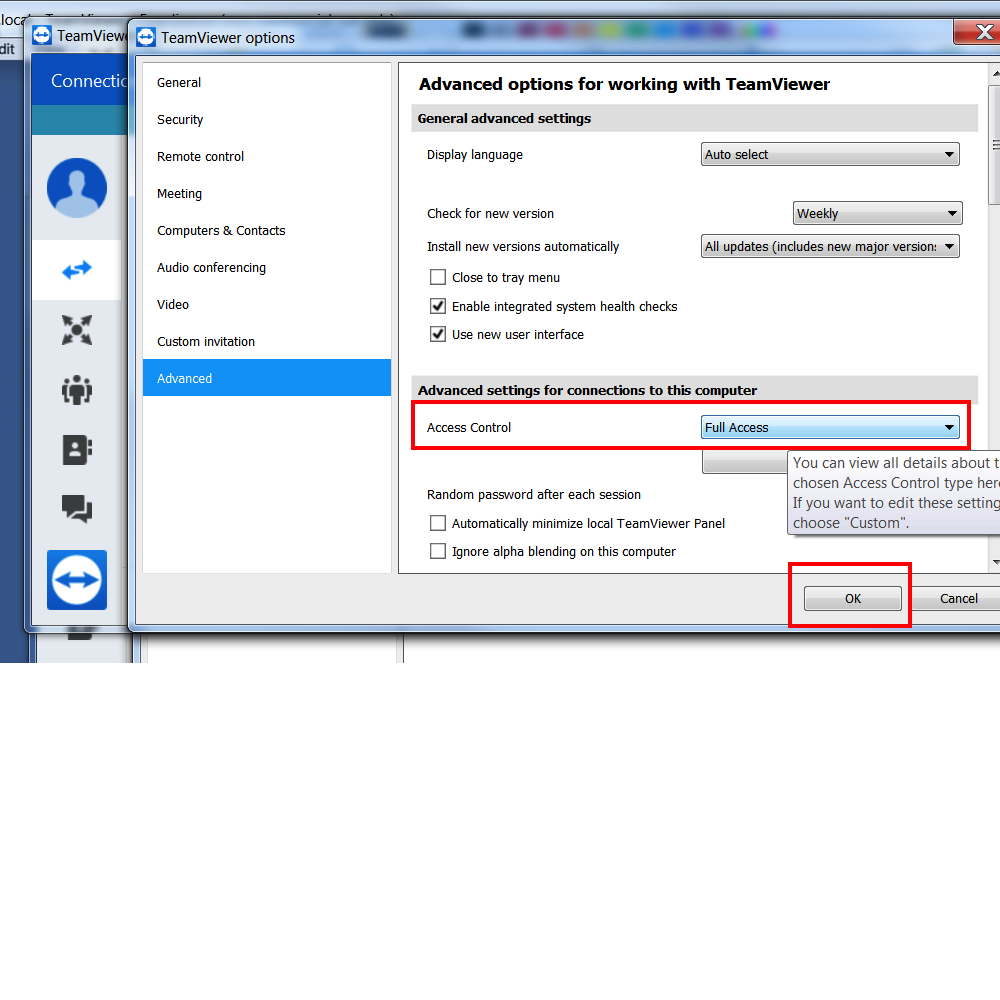
Change the Access Control drop down box to Full Access then OK
Method 2)
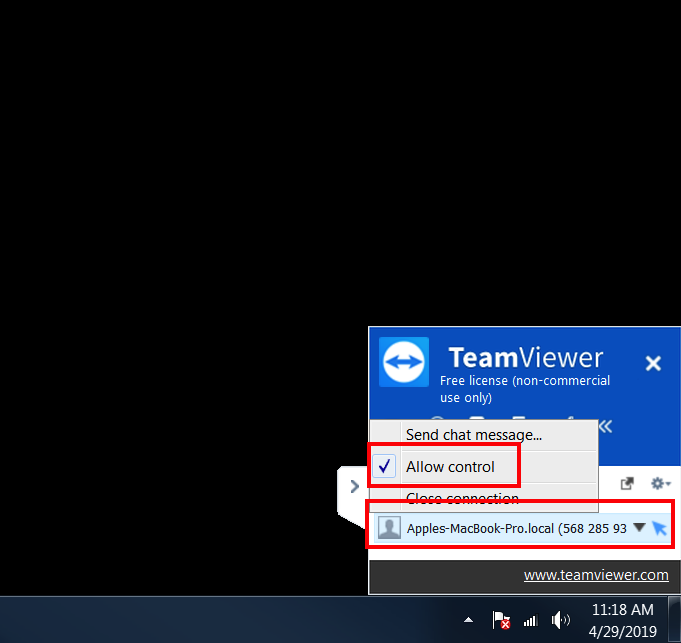
Open up the small Teamviewer Tab

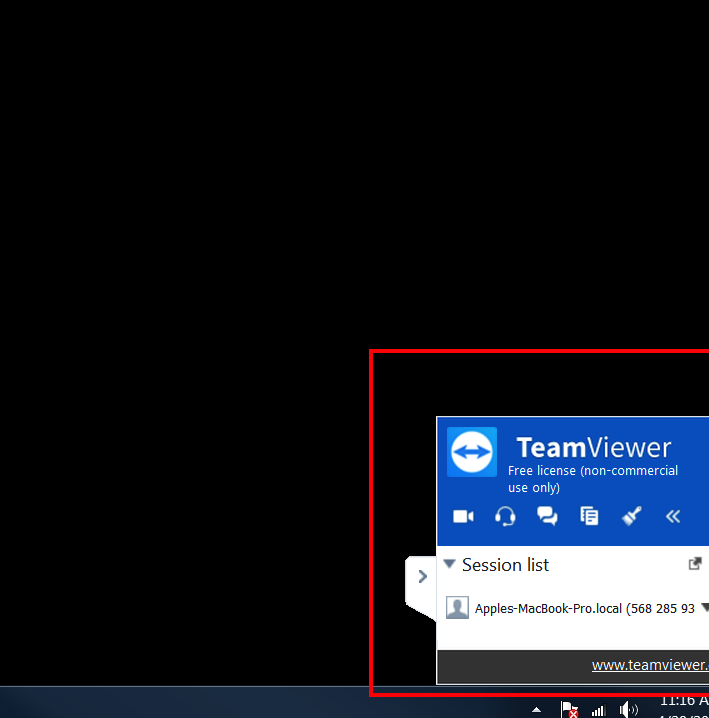
Click on the remote computer listed under Session list then make sure Allow control is selected
End of Windows Instructions
Mac
Part 1 TeamViewer Settings
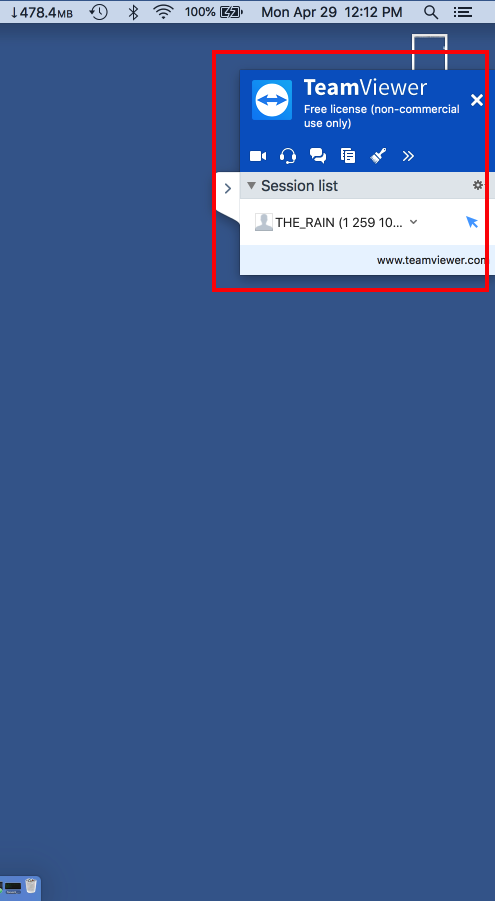
Make sure you are allowing remote access through TeamViewer. Open up the small Teamviewer window.

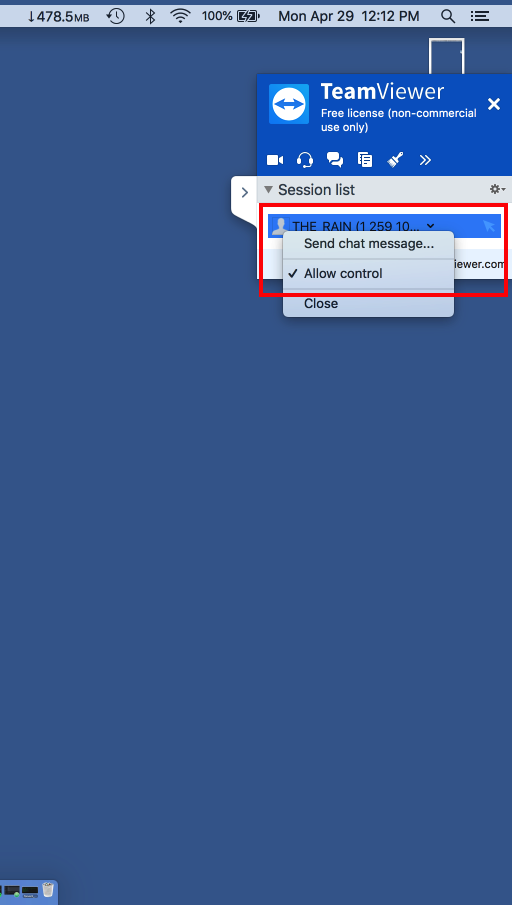
Click on the remote computer under Session list then make sure Allow control is checked
Part 2 System Settings
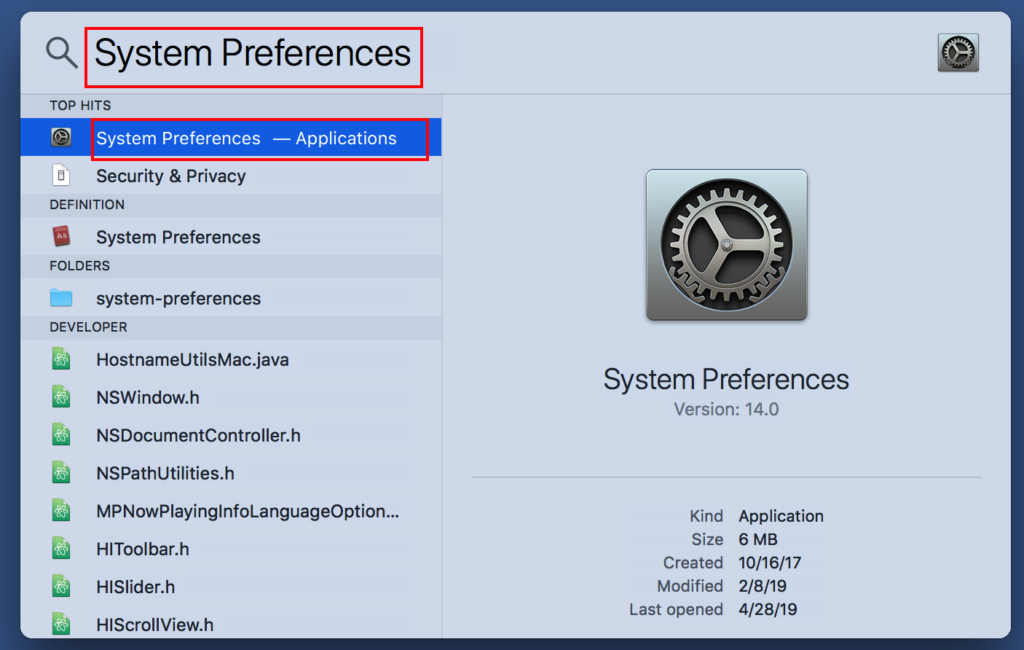
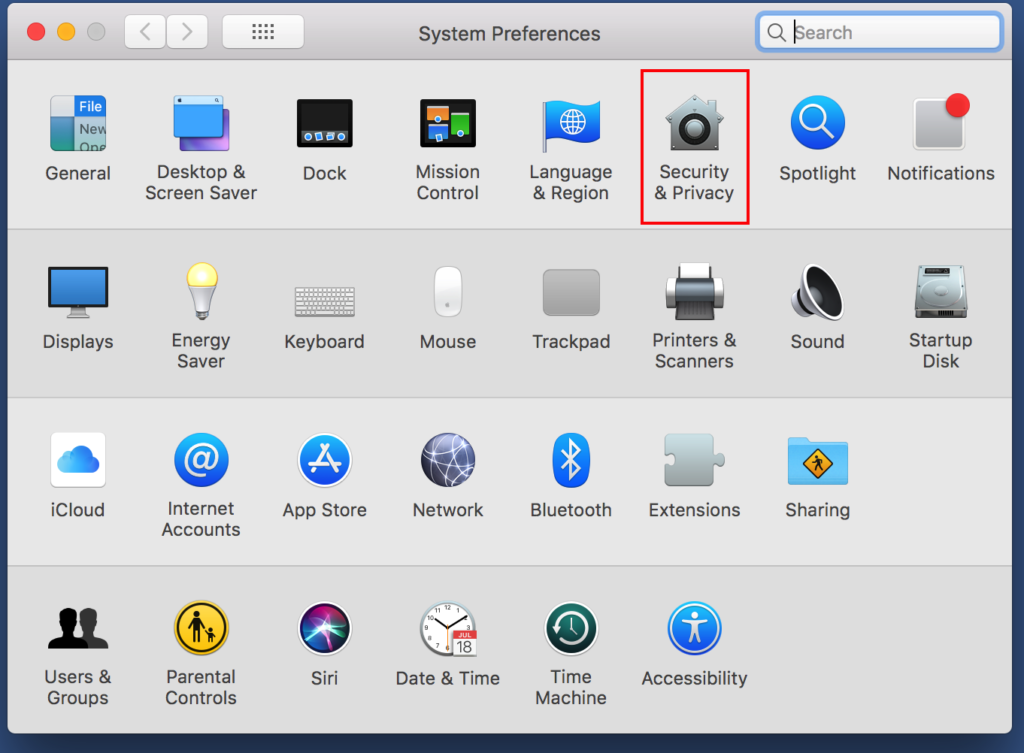
Allow TeamViewer to have access in System Preferences. Open System Preferences. One way is by pulling up Spotlight Search (Command + Space Bar) and then searching for System Preferences.
Click on Security & Privacy
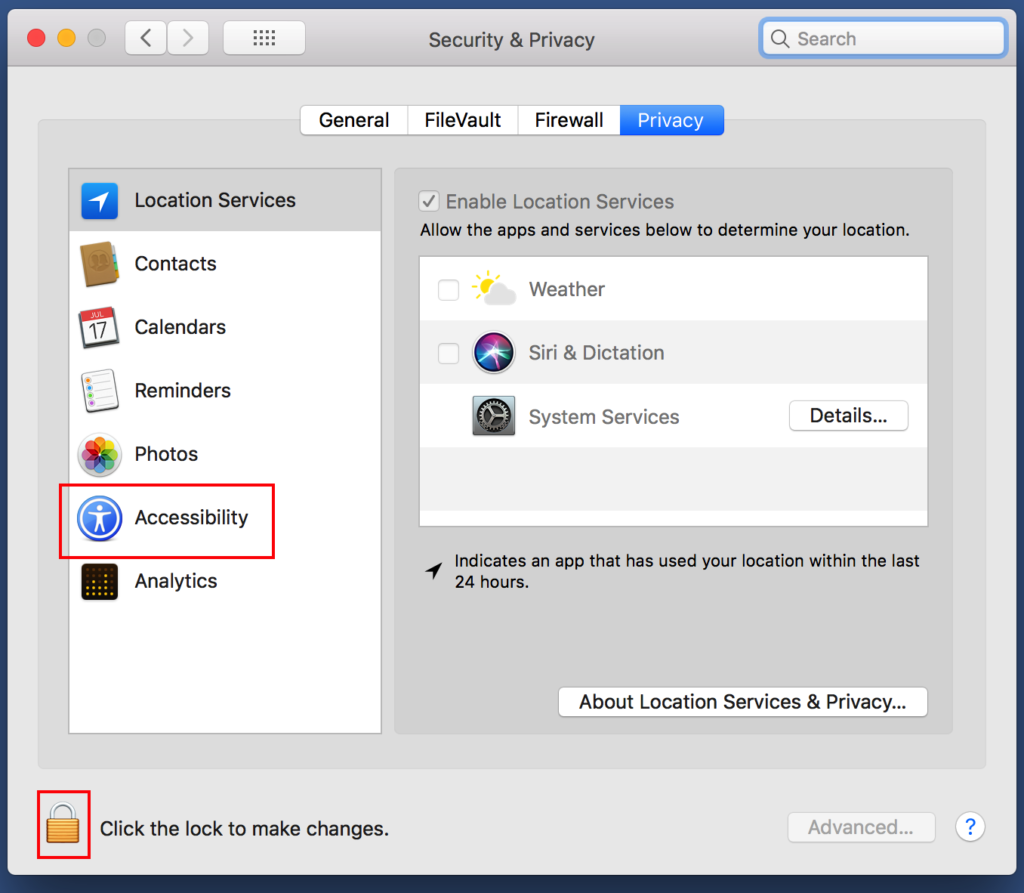
Unlock the settings by clicking on the small lock symbol at the bottom. Then click on Accessibility.
Now make sure TeamViewer and TeamViewer_Desktop are Selected
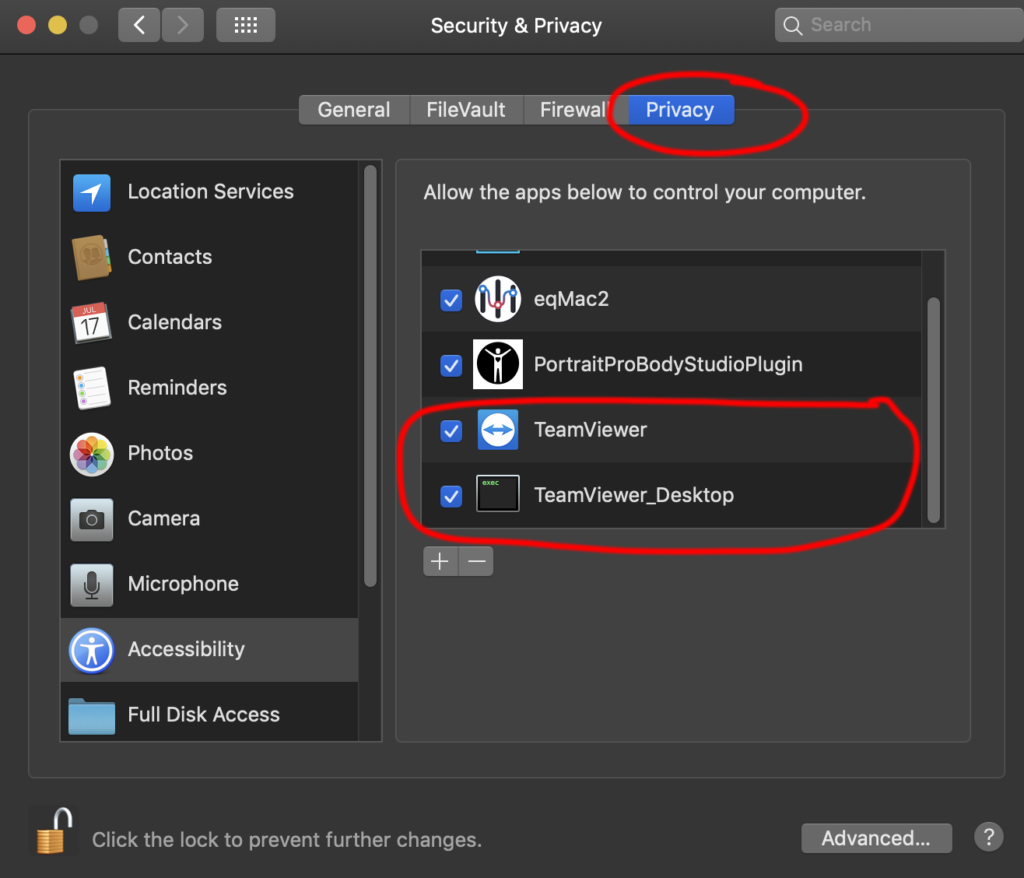
That’s it!
You have now granted access to your computer.
Leave a Reply